 Even the most gadget-adverse bike tourist is likely to carry a digital camera.
After all, when you finally round the last switchback to reach that glorious mountain peak, you’ll want a photo to remember the moment! A digital camera also allows you to create a small income stream by selling your travel photos online. This takes work but can be enjoyable if you like photography.
So, what should you look for in a camera? Here are our tips:
#1. Smaller Is Usually Better.
We carried a Nikon D80 SLR for 4 years. It took nice photos but it was also heavy, prone to dust spots and its large size sometimes intimidated people. In our opinion, a compact camera will often take just as nice a photo and it’s a lot easier to handle.
For a good example of what a small camera can do, check out the photos on the 14 Degrees site.
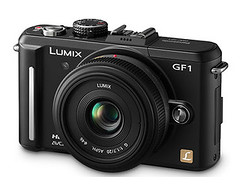 They were taken with a Canon Powershot G9 (the latest model is the Canon Powershot G12). In 2011, we traded in our SLR for the Panasonic Lumix GF1 with a 20mm pancake lens. The GF1 is still a great camera but has been replaced by the GF5. For something more advanced from Panasonic’s micro four-thirds range, you might also consider the Lumix GX1
.
If you’re determined to go for an SLR, you probably have your reasons. We won’t argue. Just get a large handlebar bag.
#2. Battery Life Is Crucial.
Go for the longest lasting battery you can find. You may not be able to recharge your camera each night and the last thing you want is a dead battery just as a magnificent view opens up in front of you. For reasons of battery life alone, try to avoid cameras that use an LCD screen as a viewfinder (these eat energy), or get a spare battery.
You will have to decide whether you want a camera that takes AA batteries or a Lithium Ion cell. On the upside, AA batteries are universally available and you can usually carry multiple sets. On the downside, they often don’t last as long as a Lithium Ion cell. Either way, you’ll probably have to take a charger with you because very few cameras allow batteries to be recharged via USB or while still in the camera.
#3. Get A Big Memory Card.
Whatever comes with the camera won’t be big enough. Memory cards are cheap these days and the more room you have, the less you’ll have to worry about burning CDs on the road. It’s worth going with one of the better known brands like Sandisk for speed and reliability.
A 2GB card would be a minimum size but 4-8GB is better if you plan to use the video function that comes with many cameras. A larger card will let you shoot more photos in the highest quality, which will be useful down the road if you ever want to sell your photos or print poster-size pictures of you and your bike.
#4. Back Up Your Photos.
How you do this will depend on the length of your trip and what else you’re carrying. Because our trip is long, we have a laptop for picture editing and storage (we use the open source and free GIMP program for photo editing). We store the pictures on the laptop.
We also upload pictures to our personal server, to Flickr and – when we’re on a long trip – we burn DVDs of our photos to send home and upload our pictures to our website (usually a quick process even for full-sized JPEGS but sometimes it has to be delayed because of poor internet connections). Every few months, we delete the photos from our computer to free up space. If you’re not carrying a laptop, many internet cafes or photography shops will burn a DVD for you.
#5. Get A Mini-Tripod.
 You’re unlikely to need a full-size tripod but there are a few intriguing miniature options, including the Gorilla Pod with legs that wrap around anything.
We use it for taking self-portraits and shooting videos on the move (the tripod will wrap around your handlebars to hold the camera securely to the bicycle). It also offers extra stability when you need a slow shutter speed to take photos in low-light situations.
#6. Organise. Organise. Organise.
If you don’t sort your photos, it’s easy to end up with a digital version of the jumbled boxes full of paper pictures most of us have stuck in a drawer somewhere. We download our photos directly into folders based on each country we visit and sometimes further broken down by region or a specific event. This makes it a lot easier to find photos later.